Camera angles: choose the view that explains the product
Choose the angle based on what you need to show. A wider shot gives context, while a closer view can explain a product detail.
Change the view while keeping the product fixed
We made these diagrams to compare 4 views of the same pouch. The 3 compartments, cable, bottle and comb stay in place as the view changes. This is a simple drawing, not a physical prototype or a reconstruction of an advertiser’s camera setup. It doesn’t simulate fabric, zip movement, lenses or lighting.
The 3-compartment layout is readable. Height is compressed. This view is for arrangement, not volume.
Show where the cable, bottle and comb sit before showing access.
The model’s high-angle example uses a 45-degree downward orientation. Overhead looks directly down. The level view looks across the product. The tighter example keeps the high angle unchanged and adjusts the illustration’s framing. These are defined planning values, not measurements or recommended settings for an actual product shoot.
A camera angle describes the orientation of the camera toward its subject. For a product ad, choose the angle that makes the relevant feature visible. Camera height, distance and framing are separate decisions. Compare the same planning model before writing the shot list.
Compare what each frame reveals and hides
Overhead
The 3-compartment layout is readable. Height is compressed. This view is for arrangement, not volume.
Show where the cable, bottle and comb sit before showing access.
High angle
A downward view combines the compartment layout with the outer profile. The near wall can still hide lower details.
Connect the layout to the product's shape. Check every claimed feature in the frame.
Level with the product
The front profile and taller bottle remain visible. The near wall hides the lower contents and compartment layout.
Show the outer profile. Use another angle if the message depends on the compartments.
Same high angle, tighter framing
The tilt is unchanged from the high-angle example. A tighter frame enlarges the bottle area and cuts away part of the product.
Show a detail after the whole product is understood. Tighter framing is not a new camera angle.
From above, you can see the compartments but get less sense of height. At product level, the front wall hides some of the contents. Those differences come from this drawing. They don’t tell us which angle would get more clicks or sales.
Separate the camera angle from the shot size
- Angle
- Which direction the camera points relative to the subject. A high-angle shot looks down. A level orientation looks across.
- Position
- Where the camera is, including its height relative to the product. Record this alongside the intended tilt.
- Framing
- How much of the product and setting is inside the frame. A closer crop can use the same angle.
- Field of view
- The range the lens captures. Lens and distance choices need a real shoot review. This schematic uses a simplified projection.
- Product proof
- The feature the viewer must actually be able to see. If an obstruction hides it, change the view or action before writing a claim.
TAMRON’s official angle and position explanation, checked October 14, 2026, distinguishes orientation, camera position and field of view. The production examples and geometry here are original. No vendor image or lens recommendation is imported.
Use actual references without inventing their camera settings
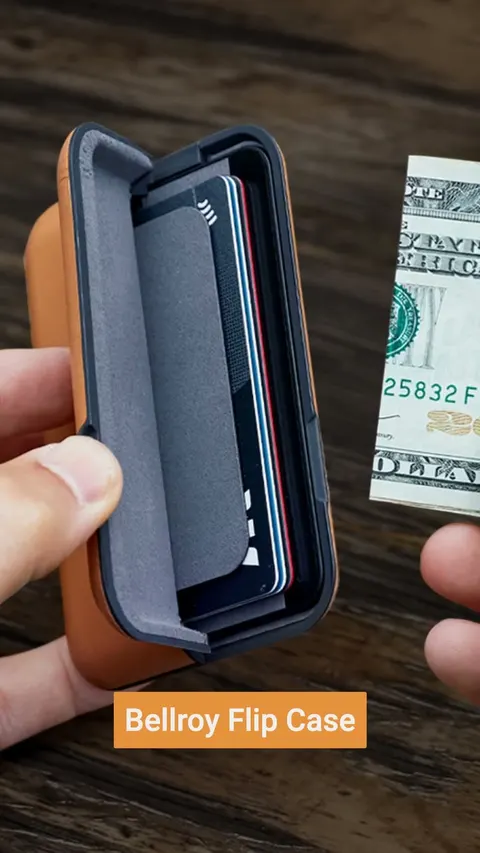
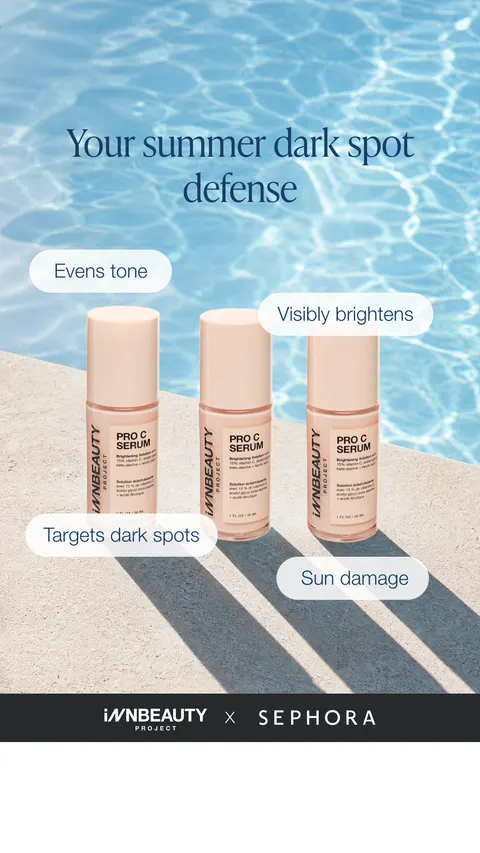
Bellroy shows the case open so you can see inside. INNBeauty places product labels around the products. You can use either reference to discuss what needs to stay visible, but we don’t know their camera settings, lighting setup or results.
The Bellroy preview is a short silent snippet with a retained poster. It is not complete video, audio or production-method evidence. Use the reference to name what must stay visible in your own frame, then verify your actual product and camera position during the shoot.
Turn the selected view into a shoot assignment
- Name the product feature and the statement it can substantiate. Verify the real product rather than copying this design.
- Choose a view that reveals the feature. Record angle, height and framing separately so another person can reproduce the intention.
- Check hand placement, foreground objects and the near edge of the product. A visible outer silhouette does not prove the contents are visible.
- Attach the view to a storyboard frame, action and script line. Preserve the intended comparison if you plan to test alternatives.
- Review actual footage at its delivery size. Update the plan when real materials, focus, movement or lighting differ from the schematic.
Choose the angle around the feature you need to explain. If the shot hides that feature, move the camera or change the action before adding more copy.
Use the shot-list template and storyboard to connect the camera choice to production. A proposed comparison belongs in the creative brief.
Download the original views and working plan
Start with the blank worksheet, or read the filled-in example to see how to use it. You can copy either one.
Authored October 14, 2026. All product and geometry assumptions remain explicit in the downloads. Verify real captures and ownership before publishing your own work.